The real reason a tech pack takes 6 hours (and what changes in 2026)
TL;DR: Creating a tech pack traditionally takes hours of tedious manual data entry and cross-referencing, but AI-driven automation is changing the game in 2026. By generating validated, measurable assets first, FashionINSTA's node-based workflow compresses the entire process to under an hour. This guide breaks down the exact steps, inputs, and troubleshooting tips to achieve factory-ready tech packs faster than ever.
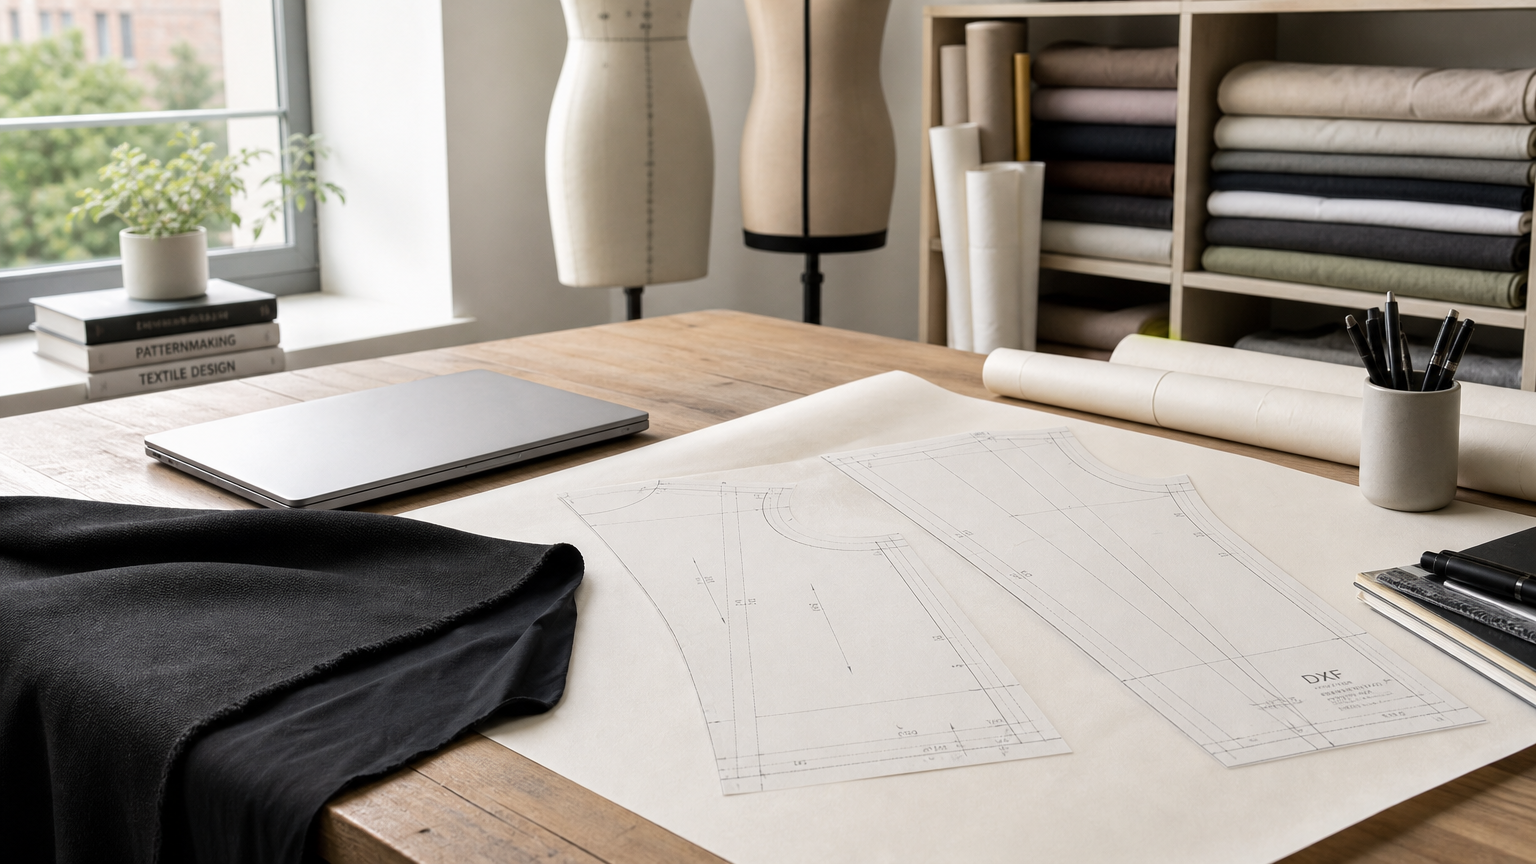
Six hours is not an accurate estimate of how long it takes to type a tech pack. It is an honest count of how long it takes to do everything else: locate the nearest reference block, transcribe measurements from a physical sample, format POM tables, compile the bill of materials (BOM) from three different supplier emails, write construction notes from memory, then chase down every inconsistency when the factory sends back revision queries.
The writing itself is rarely the bottleneck. The bottleneck is the sequence of micro-tasks that precede and follow it.
In 2026, the workflows that actually compress this to under an hour share one structural characteristic: they convert a design brief into validated, measurable assets first, then assemble the document from those assets. The document becomes a compilation step, not a creative exercise. That shift is what separates tools with genuine AI tech pack automation from products that generate a plausible-looking spec sheet with wrong geometry.
This guide gives you:
- A pre-flight input checklist to prevent rework before you start
- The exact FashionINSTA node sequence with realistic timeboxes per step
- A complete worked example (women's fitted bodice) that totals under 55 minutes
- A troubleshooting checklist for when the workflow stalls
Who this is for: Technical designers, R&D directors, and product development leads who already understand tech pack anatomy and want a repeatable, faster workflow using AI tech pack automation. You should be comfortable reading graded .DXF patterns and reviewing POM tables.
Difficulty: Intermediate. Expected time investment (first run): 45-55 minutes for a single-style first draft, plus a 10-15 minute review pass.
Required inputs and pre-checks: the checklist that prevents rework
The single most reliable way to overshoot the 1-hour target is to start the workflow with incomplete inputs. Fix the data first; run the nodes second.
Input checklist
Before opening any apparel tech pack software, confirm you have all of the following:
- Sketch or design brief, a clean flat or 3D export (CLO 3D, Browzwear, or equivalent), not a mood-board image. The geometry needs to be readable.
- Garment category and construction intent, silhouette, degree of fit (close/relaxed/oversized), lining specification, and seam allowance convention.
- Size range and base size, e.g., US sizes 0-16 with a size 8 base. Grading increments matter for DXF output.
- Target fit / brand philosophy, torso length, hip-to-waist ratio, ease allowances. If you use Backbone PLM or a similar system for fit history, pull your active fit standard before proceeding.
- BOM requirements, primary fabric (fiber content, weight, finish), lining, interlinings, zippers, labels, and any MOQ constraints from your preferred suppliers.
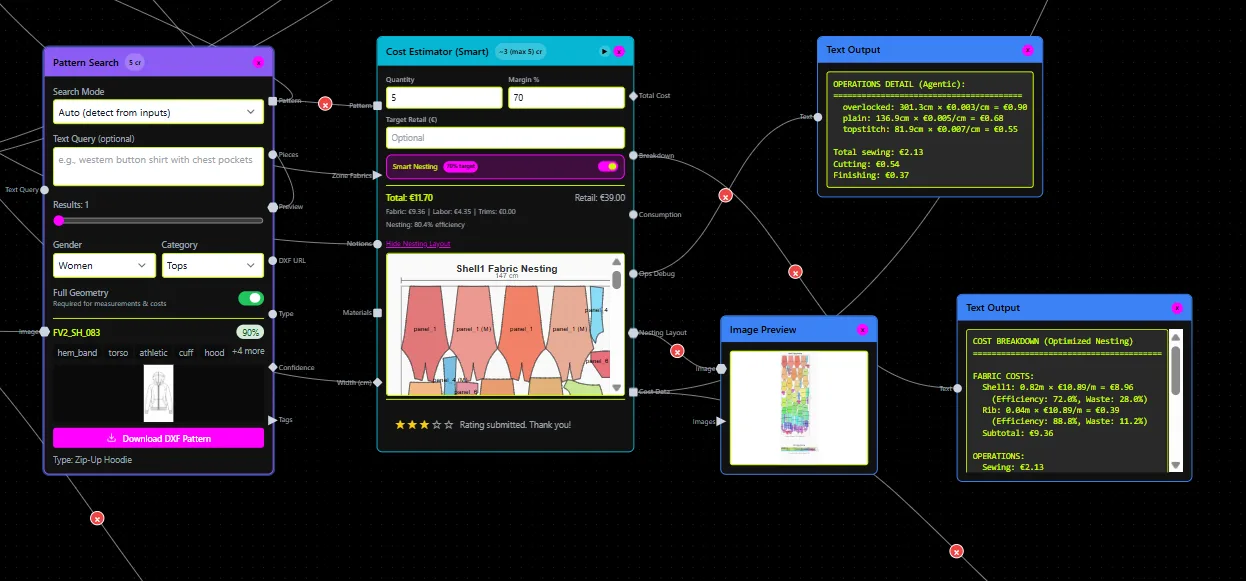
- Reference block availability, is there an existing .DXF in your pattern archive that covers this style class? A matched reference block reduces generation time and improves geometry accuracy.
Pre-flight checks
Run these three checks before triggering any node:
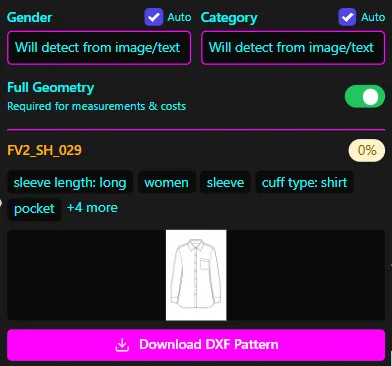
- DXF cleanliness: Open the reference .DXF in your CAD system (Gerber, Lectra, Tukatech, V-Stitcher, or equivalent) and verify no open notch paths, duplicate seam lines, or corrupted grain lines. A dirty file passed to the Pattern Generator produces mismatched output geometry.
- POM definitions: List every point of measure using ASTM-aligned naming conventions. Ambiguous POMs (e.g., "chest" without specifying above/below armhole or measurement posture) will produce an unusable spec table downstream.
- Fabric/cost constraints: If you have a target cost-of-goods (COG) price, note it before running the Cost Estimator node. Entering it retroactively after feasibility analysis forces a second pass.
Decision rule
If all six inputs are confirmed and both the DXF reference and POM list are clean: proceed directly to the node workflow. Expected total time: under 1 hour.
If any one of the following is missing or unclear, resolve it first (typically 15-30 minutes of data prep):
- No existing reference block for this style class
- Fewer than 8 POM points defined
- BOM has placeholder fabric entries with no fiber content or weight
Skipping this resolution step does not save time. It shifts the rework to the back end of the workflow, where it costs three times as much clock time.
The exact FashionINSTA workflow to get under an hour
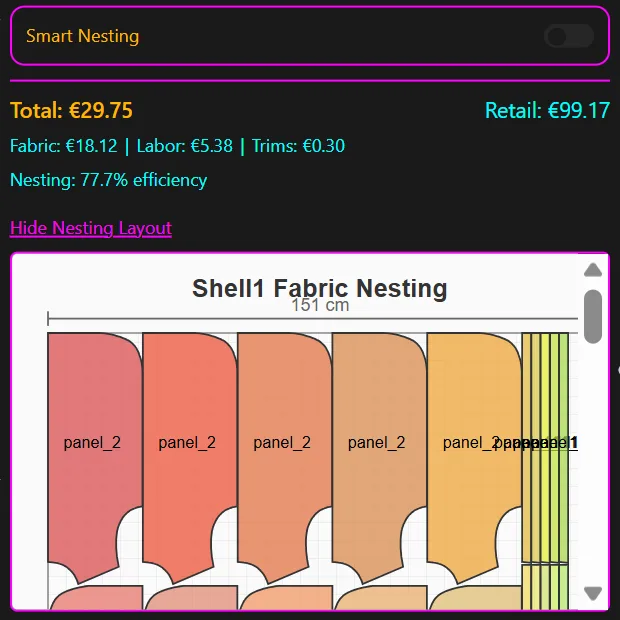
FashionINSTA's node-based architecture lets you chain five specialized nodes in a defined sequence. Each node produces a discrete artifact. Each artifact feeds the next node. No node produces a "pretty picture" that cannot be manufactured; the platform's positioning is explicit on this: real garments, graded geometry, and factory-ready documentation.
The nodes and their sequence:
Step 1, Pattern Generator (8-12 minutes)
What you do: Input your design brief, garment category, base size, grading range, and reference .DXF (if available). If FashionINSTA has been trained on your brand's production archive (the platform ingests 750+ features per pattern from your existing .DXF library), it retrieves the closest matching block and adjusts for your specification delta. Without custom training, it generates from its base dataset of 50,000+ ingested patterns.
What the node produces: A graded .DXF pattern set, CAD-compatible and exportable for Gerber, Lectra, Tukatech, or V-Stitcher. This is the geometry foundation for every downstream node.
What you verify: Open the output .DXF in your CAD system. Confirm grain lines, notch positions, seam allowances, and size step consistency. Flag any geometry discrepancy now, before the BOM Agent runs. Rerunning Pattern Generator after BOM generation wastes 20-25 minutes.
Step 2, BOM Agent (5-8 minutes)
What you do: Pass the confirmed pattern geometry and your BOM requirements (fabric type, weight, fiber content preference, trim specifications) to the BOM Agent.
What the node produces: A populated bill of materials for apparel with real fabric names, compositions, prices, and MOQs sourced from verified suppliers. Not placeholder text. Not "100% cotton woven fabric." Actual supplier data.
What you verify: Cross-check that fiber content and weight align with your construction intent (e.g., a 7 oz. cotton twill for a structured bodice, not a 3.5 oz. shirting). Confirm trims are complete: zipper length, label type, hang tag, care label. Missing trim entries are the most common BOM gap.
Step 3, Cost Estimator (3-5 minutes)
What you do: Feed the confirmed BOM output into the Cost Estimator, together with your target COG and the graded pattern (for fabric consumption calculation).
What the node produces: A cost-of-goods calculation based on fabric consumption from the actual DXF geometry, construction complexity score, trim costs from BOM, and labor estimate. This is not a spreadsheet approximation; fabric consumption is calculated from the pattern geometry you validated in Step 1.
What you verify: Does the COG output land within your target range? If it exceeds target by more than 15%, note the driver (usually fabric yield or construction complexity) before moving to feasibility analysis.
Step 4, Feasibility Analyzer (4-6 minutes)
What you do: Run the Feasibility Analyzer against the pattern geometry, BOM, and cost output.
What the node produces: A manufacturability assessment at your target price point. The node flags construction issues (e.g., tight curve radii that require specialized equipment, complex intersections that increase labor time) and marks each flag as a blocking or advisory issue.
What you verify: Blocking flags must be resolved before compiling the tech pack. Advisory flags can be passed through to the factory as noted exceptions. Do not proceed to the Tech Pack Compiler with unresolved blocking flags; the factory will return them as revision requests, which collapses your time savings.
Step 5, Tech Pack Compiler (8-12 minutes automated + 10-15 minutes review)
What you do: Pass all upstream outputs (graded DXF, confirmed BOM, COG, feasibility clearance) to the Tech Pack Compiler.
What the node produces: A factory-ready tech pack containing: graded measurement table (POM-aligned), construction notes compiled from pattern geometry, fabric specifications from BOM, colorway details, and formatted documentation at factory standard. FashionINSTA describes this as "auto-generated tech packs with measurements, construction notes, fabric specs, and colorway details."
What you verify (the final 10-15 minutes): This review pass is where your technical judgment replaces recreation. Check measurement consistency across sizes, confirm construction callouts match your construction intent, verify colorway naming follows your internal convention, and confirm the document is formatted for factory handoff (not internal draft format).
Total automated processing: approximately 28-43 minutes. Human review and verification: approximately 15-20 minutes. Combined: 43-63 minutes for a complete, factory-ready first draft.
Worked example: women's fitted bodice, upload to DXF export to tech pack review
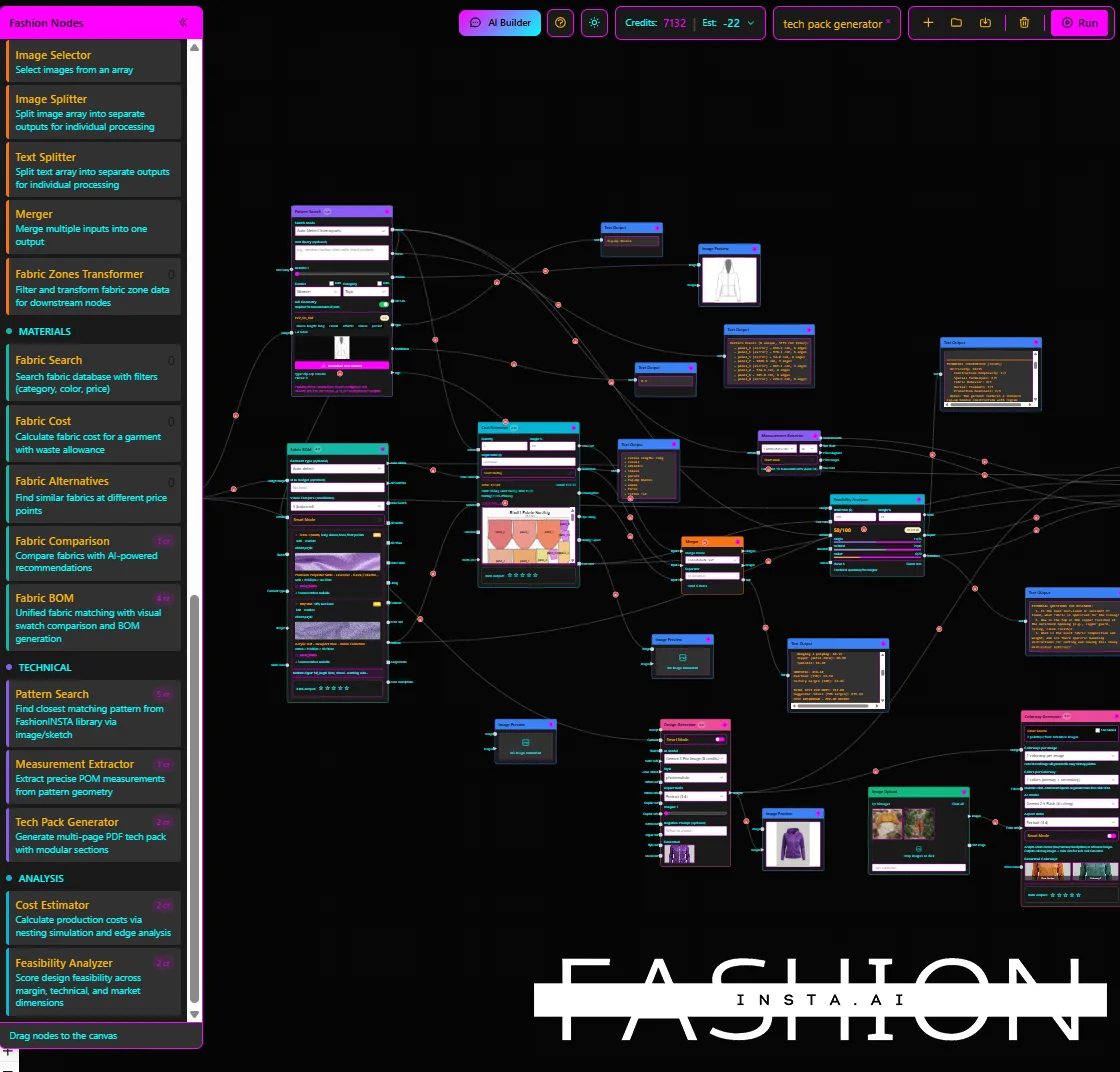
Scenario: A size 8 base, US 0-16 grade, fully lined structured bodice with a back invisible zipper. Target COG: $18.00. No existing reference block in the brand archive for this exact style, but a close sleeveless bodice .DXF is available.
What you have at the start: - Clean sleeveless bodice .DXF (verified in CLO 3D before session) - Design brief: princess seaming, 1 cm seam allowances, structured shoulder, back zip - POM list: 12 points (bust, waist, hip, CB length, CF length, shoulder width, armhole depth, side seam length, neck width, neck depth F/B, and zipper placement) - BOM draft: primary woven (unspecified), lining (unspecified), 22 cm invisible zipper, care label, woven brand label
| Time | Step | What you do | What the system generates |
|---|---|---|---|
| 0:00-0:10 | Pattern Generator | Upload brief + sleeveless DXF, set base size 8, grade US 0-16, specify princess seam + back zip + 1 cm SA | Graded .DXF with princess seams, back zipper opening, and correct SA applied across all sizes |
| 0:10-0:16 | DXF review | Open in CAD system, verify 9 graded pieces, check notch alignment at princess seams | Sign off; no geometry flags |
| 0:16-0:23 | BOM Agent | Input: woven suiting weight, structured hand, lining required, invisible zipper 22 cm | BOM: 150 gsm polyester-viscose blend (specified supplier, $4.20/m, MOQ 50m), polyester lining ($1.80/m), Riri 22 cm invisible zip ($0.95/unit), labels |
| 0:23-0:27 | Cost Estimator | Pass BOM + DXF (for yield) + $18 COG target | COG output: $16.40 at 1.4m fabric yield. Within target |
| 0:27-0:33 | Feasibility Analyzer | Run against pattern geometry + BOM | 1 advisory flag: princess seam at apex requires skilled operator. 0 blocking flags |
| 0:33-0:45 | Tech Pack Compiler | Compile all upstream outputs | Factory-ready tech pack: 12-POM graded spec table, 8 construction notes, BOM table, colorway (1 colorway named), formatted PDF |
| 0:45-0:55 | Review pass | Check POM consistency, construction callouts, BOM completeness, colorway name, formatting | Confirmed ready for factory handoff |
Manually, this same process would require: locating the reference block (15 min), manually grading or requesting a graded pattern (60-90 min if outsourced, 30 min if in-house), writing 12 POM measurements with size breaks (25 min), sourcing BOM fabric data from supplier contacts (30-45 min), building the COG spreadsheet (20 min), and assembling the formatted document (45-60 min). Total: 3.5-4.5 hours minimum, before the first revision cycle.
Final review checklist
Before sending to the factory, confirm all five of these:
- [ ] All POM points have consistent measurements across the full size range with no rogue values at extreme sizes
- [ ] Construction notes reference every seam type used in the pattern geometry (no orphaned notch or seam without a corresponding note)
- [ ] BOM includes fiber content, weight, width, color reference, supplier, price, and MOQ for every line item
- [ ] Colorway naming follows your internal SKU convention (not generic "Color 1")
- [ ] Document format matches your factory's intake standard (page size, measurement units, language)
Troubleshooting: how to hit the under-1-hour target reliably
The three accuracy drivers (in order of impact)
1. Input geometry quality. If the reference .DXF contains open paths, incorrect grain lines, or inconsistent seam allowances, Pattern Generator output will carry those errors forward. Clean the source file; do not attempt to correct geometry after compilation.
2. POM definition completeness. Vague measurement names produce ambiguous spec tables. Standardize POM nomenclature before running the workflow, ideally aligned to ASTM garment terminology. Twelve well-defined POMs are more useful than 20 ambiguous ones.
3. BOM specificity. The BOM Agent returns real data only when given a specific enough input. "Woven fabric, medium weight" returns a broader and less accurate result than "woven suiting, 130-150 gsm, polyester-viscose, structured hand, 150 cm width."
Common failure modes and remedies
Mismatched pattern geometry vs. brief: The generated .DXF does not reflect the construction intent (e.g., zipper opening missing, seam type incorrect). Remedy: correct the brief inputs and rerun the Pattern Generator only. Do not rerun BOM Agent, Cost Estimator, or Feasibility Analyzer unless the geometry change materially affects fabric yield.
Missing or unclear construction notes in the compiled tech pack: Usually caused by ambiguous seam allowance or lining specifications in the original brief. Remedy: add explicit construction parameters to the brief, then rerun the Tech Pack Compiler only. The upstream nodes do not need rerunning.
BOM gaps: Trim entries missing (most commonly care labels, hang tags, or secondary zippers). Remedy: complete the BOM input and rerun the BOM Agent. Rerun Cost Estimator to capture the trim cost delta. Do not rerun Pattern Generator or Feasibility Analyzer unless the added trim affects construction complexity.
Feasibility blocking flag forces a second draft: A construction detail is flagged as unmanufacturable at the target price point. Remedy: assess whether the flag can be resolved by modifying the pattern (back to Pattern Generator) or by adjusting the COG target (update Cost Estimator inputs only). Determine the narrower intervention before rerunning the full chain.
Operational tips for consistent sub-1-hour results
- Build and save reusable BOM templates per style class (bodice, trouser, outerwear). Pre-populated fiber content, standard lining, and label specifications reduce BOM Agent input time to under 2 minutes on repeat styles.
- Lock fit-critical parameters (ease allowances, seam allowance conventions, shoulder point definitions) in a standardized brief template. Variation in these inputs is the leading cause of POM inconsistency across a seasonal line.
- Maintain a minimum "standard tech pack anatomy" per garment category: define how many POM points, how many construction notes, and which BOM sections are required before a tech pack is considered complete. This prevents under-specified packs reaching the factory.
- For teams evaluating FashionINSTA's enterprise path: the platform's custom training on a proprietary pattern archive (ingesting 750+ features per pattern) reduces Pattern Generator review time on repeat style classes because the model is working from your own fit blocks, not a generic dataset.
FAQs and next steps
Can an AI tech pack generator produce a factory-ready tech pack? Yes, provided the inputs are complete and validated. The gap between AI-generated spec sheets and factory-ready documents is almost always an input quality problem, not a generation problem. A system that compiles from validated pattern geometry, real BOM data, and feasibility-checked construction notes produces a document a factory can act on. A system that generates a spec sheet from a product description photo produces a document that looks correct but may have wrong measurements and unmanufacturable construction details.
Will FashionINSTA export DXF files for my CAD system? Yes. FashionINSTA generates graded, CAD-compatible .DXF patterns intended for Gerber, Lectra, Tukatech, V-Stitcher, and other major CAD platforms. The export is intended for factory use, not visualization only. For teams working in CLO 3D or Browzwear, the .DXF output can be used as the base pattern for 3D simulation.
How do I reduce revision cycles? Revision cycles are predominantly driven by three gaps: geometry errors in the pattern, ambiguous construction notes, and incomplete BOM data. Addressing all three at the input stage (using the checklist in this guide) eliminates the majority of factory-originated revision requests. The Feasibility Analyzer node adds a pre-factory check that flags constructability issues before they become revision cycles.
What do I need from my existing pattern archive? For standard node usage, any clean .DXF reference block in the relevant style class. For custom-trained Pattern Intelligence (the enterprise path), FashionINSTA requests a production .DXF archive of 30-50 patterns per category, which it cleans and trains within a four-week onboarding window. This is the configuration that enables the platform to generate new patterns from your own fit blocks rather than a generic base dataset.
How does this compare to other apparel tech pack software? Tools like Techpacker (PLM Professional at $95/year) provide strong document collaboration, version control, and PDF/Excel export, but rely on manual data entry for measurements, BOM, and construction notes. AI-first tools position on speed of document generation, but most operate at the spec-sheet layer without touching pattern geometry or BOM verification. FashionINSTA operates at the geometry and data layer first, then compiles the document from those verified outputs. That distinction matters if your factory revision rate is currently above two rounds per style.
Start your first under-1-hour workflow
The fastest path to validating this workflow is a scoped single-category trial. Before requesting a demo or PoC, prepare:
- One clean .DXF reference block for your most common style class
- A standardized POM list (minimum 10 points, ASTM-aligned naming)
- A BOM draft with fiber content and weight specified for primary and lining fabrics
- Your current average tech pack cycle time as a baseline for comparison
With those four items ready, a first-run demo on a single style can be completed in a single working session. FashionINSTA's Enterprise PoC is scoped as a 10-week engagement covering one category, priced at €5,000-15,000 as a one-time fee, and includes onboarding and node credit allocation.
Visit fashioninsta.ai to request a PoC scoping session or explore the free Fashion Nodes tier with 150 credits.